Here at North States, we’ve been bringing songbirds to backyards and decks since 1953. Our mission has been to create and produce innovative, superior quality products designed to provide a healthy place for birds to gather while enhancing the serenity of our environment. With that being said, we would also like to provide our fellow bird-loving friends some tips and tricks as you use our products.
Who do you want to attract to your yard?
With all of the options of birdfeed and birdfeeders, it can be overwhelming to determine which is best for your yard. We’ve created a chart to help you determine the correct feed and feeder for the birds that you want in your yard. Find out which types of birds frequent your area and choose your feeders and seed according to the type of local bird you would like to attract. When putting a feeder in your yard for the first time, be patient. It may take a week or more for birds to find your feeders. Birds may also be slow to try a new feeder and some are finicky about the type of food they prefer. Print this chart >
| Bird Feeding Chart | Blue Jay | Cardi- nal | Chick- adee | Dove | Finch | Gold- Finch | Gros- beak | Hummi- ngbird | Junco | Nut hatch | Oriole | Titmice | Wood-pecker | Hopper | Screen | Tube | Suet | ||
|---|---|---|---|---|---|---|---|---|---|---|---|---|---|---|---|---|---|---|---|
| White Millet |  Blue Jay Blue Jay |
 Cardinal Cardinal |
 Dove Dove |
 Finch Finch |
 Gold-Finch Gold-Finch |
 Junco Junco |
|||||||||||||
| Milo |  Blue Jay Blue Jay |
 Cardinal Cardinal |
 Dove Dove |
 Finch Finch |
 Junco Junco |
||||||||||||||
| Cracked Corn |  Blue Jay Blue Jay |
 Cardinal Cardinal |
 Dove Dove |
 Grosbeak Grosbeak |
 Junco Junco |
||||||||||||||
| Black Oil Sunflower Seed |  Blue Jay Blue Jay |
 Cardinal Cardinal |
 Chickadee Chickadee |
 Dove Dove |
 Finch Finch |
 Gold-Finch Gold-Finch |
 Grosbeak Grosbeak |
 Junco Junco |
 Nut Hatch Nut Hatch |
 Titmice Titmice |
 Wood Pecker Wood Pecker |
||||||||
| Striped Sunflower Seed |  Blue Jay Blue Jay |
 Cardinal Cardinal |
 Titmice Titmice |
 Wood Pecker Wood Pecker |
|||||||||||||||
| Peanut Kernels |  Blue Jay Blue Jay |
 Cardinal Cardinal |
 Chickadee Chickadee |
 Grosbeak Grosbeak |
 Junco Junco |
 Nut Hatch Nut Hatch |
 Titmice Titmice |
 Wood Pecker Wood Pecker |
|||||||||||
| Nyjer Seed/Thistle |  Finch Finch |
 Gold-Finch Gold-Finch |
 Junco Junco |
||||||||||||||||
| Safflower Seed |  Cardinal Cardinal |
 Chickadee Chickadee |
 Dove Dove |
 Grosbeak Grosbeak |
 Titmice Titmice |
||||||||||||||
| Nut & Dried Fruit Blend |  Blue Jay Blue Jay |
 Cardinal Cardinal |
 Chickadee Chickadee |
 Grosbeak Grosbeak |
 Junco Junco |
 Nut Hatch Nut Hatch |
 Titmice Titmice |
 Wood Pecker Wood Pecker |
|||||||||||
| Fresh Fruit |  Blue Jay Blue Jay |
 Grosbeak Grosbeak |
 Nut Hatch Nut Hatch |
 Oriole Oriole |
 Wood Pecker Wood Pecker |
||||||||||||||
| Nectar |  Hummingbird Hummingbird |
 Oriole Oriole |
|||||||||||||||||
| Suet |  Blue Jay Blue Jay |
 Chickadee Chickadee |
 Finch Finch |
 Nut Hatch Nut Hatch |
 Oriole Oriole |
 Titmice Titmice |
 Wood-pecker Wood-pecker |
||||||||||||
Now that you know what type of birdfeeder you will need, click here for our line of birdfeeders. You can even filter to the specific type of birdfeeder that you are looking for.
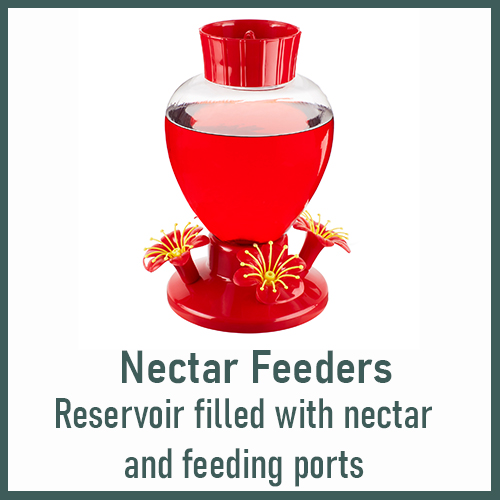
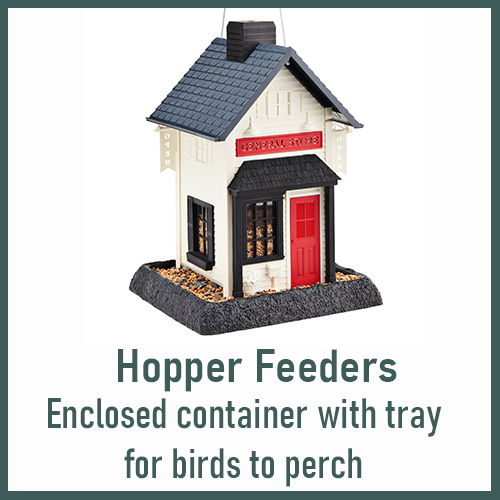
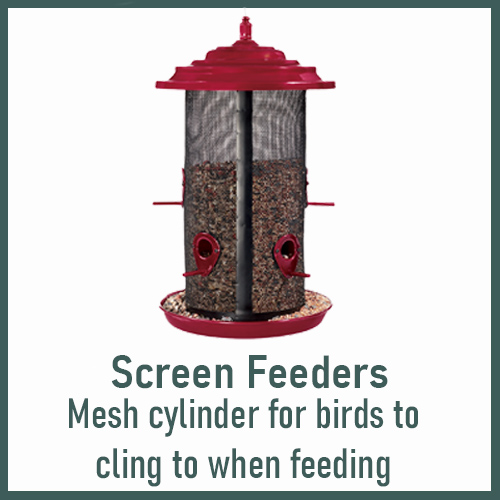
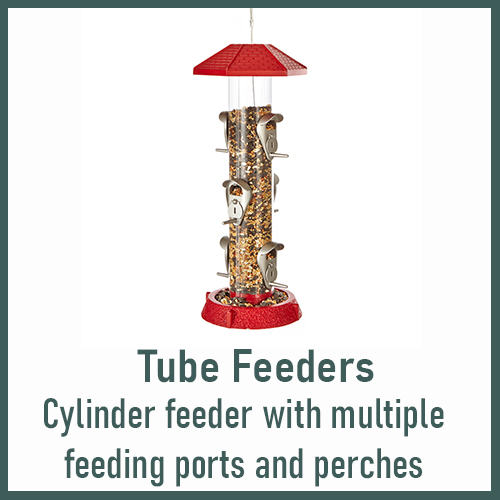
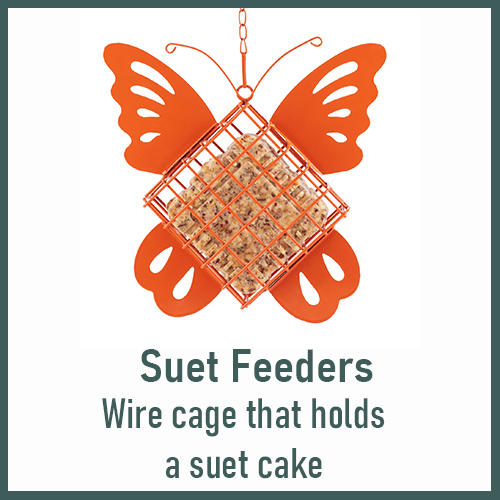
Here are some other helpful tips and tricks to keep in mind (click on the triangle for the answer):When is the best time of year to feed birds?
- Year-round feeding is encouraged. During the Fall and Winter months, especially in cold climates, natural sources of food are difficult to find. During the Spring and Summer months, birds need extra food for nesting, breeding and raising their young.
How often does the feeder need to be filled? And how do you fill it?
- All birdfeeders need to be filled on a regular basis. Most feeders can be filled through a lift-off roof or openings in the roof. The North States Feeder Filler Scoop is perfect for filling a variety of feeders; it works as a scoop and/or a funnel. Use the hand-held scoop for filling large feeders and the funnel for smaller feeders. The Feeder Filler Scoop is able to hold approximately 4 cups of seed. Always use fresh seed.
How often should a feeder be cleaned? And how do you clean it?
- Birdfeeders should also be cleaned regularly – from as often as each time the feeder is filled up to every two weeks or so. Tube and hopper feeders should be washed thoroughly in hot, soapy water and rinsed out. Dry thoroughly before refilling. Regular cleaning will prevent seed from spoiling and spreading disease.
How do I discourage squirrels from eating at my birdfeeder?
- The best way to discourage squirrels is to use a squirrel baffle – hang it below the feeder when it is pole-mounted or above the feeder when it is hanging from a tree.
- Your birdfeeder should be placed at least 4 to 5 feet above the ground, either hanging or pole mounted and at least 10 feet from nearby trees, fences, etc.
- Adding cayenne pepper to the birdseed also helps discourage squirrels, as they are bothered by the strong smell of the pepper, they will bypass it altogether – and it does not affect the birds.
- In addition, planting marigolds near your feeders discourages squirrels as well as cats, as they dislike the scent of these pungent flowers.
How do birds get large nuts out of the basket feeder?
- When you fill the basket feeder cage with nuts, the birds aren’t meant to take the whole nut out, but instead ‘peck’ at it so that pieces come out. Since there are many peanut style mixes they work really well with all nut mixes and or fruit/nut mixes
How do I remove the label from my feeder?
- To help remove the sticky label from your feeder, we recommend to soak the feeder in warm water and a mild dish soap for several minutes, then scrape off. Alternatively, you can use a mild adhesive remover such as Goo Gone, but be sure to wash it in soap and water before use with your favorite nectar or seed.
How do I clean my SuperFeeder?
- To clean this feeder, or any tube feeder, we suggest you use your garden hose and spray inside the tube to get most of the old seeds out. Then, use a bleach/water solution (1/4 cup bleach to two gallons water) and scrub with a long brush to get the feeder clean. Rinse thoroughly and dry completely before refilling the tube.
How do I remove the tray from the bottom of my Village feeder?
- The tray on the bottom of the feeder can be removed by placing the feeder on its side and using the heel of your hand to firmly tap on the tray so the tabs on the underside slide through the opening/slots. There is a raised lip on these tabs so it may require multiple strikes to the feeder. However, an (easier) option for cleaning your feeder is to remove the chimney/cupula at the top of the feeder and insert a garden hose through the opening and washing it out that way.
How can I order replacement parts to my Village feeder?
- If you need a replacement part for your Village Collection feeder, there are some replacement parts available that can be ordered directly on the North States website. Simply enter the model number of the feeder into the search bar found at the top of any page and all replacement parts will be displayed. Please note, the side walls of the Village Collection feeders come preassembled at the factory and are not available as a replacement part.
- We do have a 3-year warranty for manufacturing defects on our Village Collection feeders. A manufacturing defect would be considered a flaw in the material or a missing part upon receipt of your new feeder. This includes failure of the hanging cable, cracks in the base upon receipt, etc. Loss of a part or damage sustained to the feeder due to weather and/or wildlife is not considered a manufacturing defect.
- Please contact our customer service department at 1-800-848-8421 or customerservice@northstatesind.com for directions on how to make a warranty claim.
How do I prevent window collisions?
- Place your feeder at least 30 feet away from windows or be sure they are within 3 feet (this is why window feeders are okay to use).
Additional tips:
-
- Offer a variety of feeders and food types
- Choose the correct seed for the type of birds in your area
- Provide a water source
- Provide a natural habitat with native plants
- Place feeders near natural cover such as trees and shrubs
- Keep feeders out of reach from cats or other predators
- Avoid using pesticides near feeders
Keeping Your Hummers Happy
Hummingbirds are a birding favorite to watch as they zip about at amazing speeds. Some things to keep in mind as you care for your speedy feathered friends:
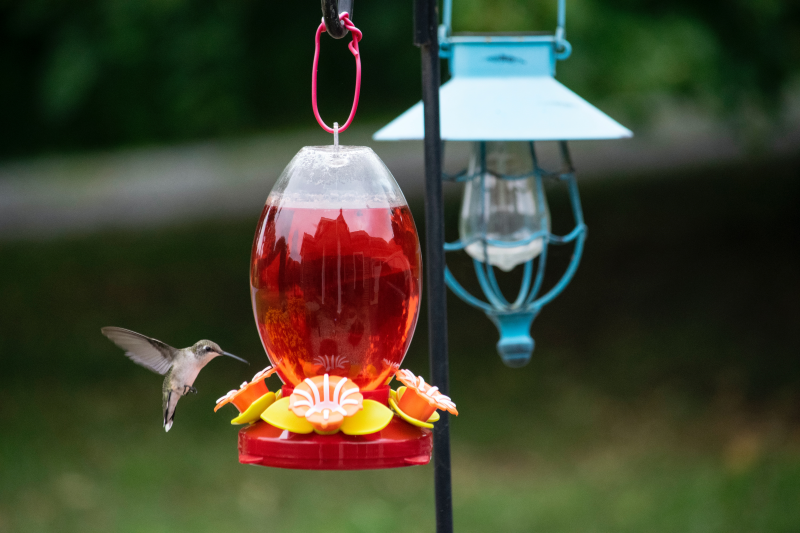
To prevent leaking, be sure to fill to maximum capacity so as to not let any air pockets form in the nectar.
- By placing the feeder in a shadier spot, you can also prevent expansion from the warmth of direct sunlight that sometimes causes leaking.
- All of our hummingbird feeders are filled by simply turning the feeder over and twisting off the base. Use a funnel or container with a pour spout to fill the reservoir with nectar (be sure to fill completely to the top to prevent leaking) and replace the base.
- When setting out of a feeder for the first time, keep in mind that they will need time to find the feeder. You can place the feeder near other flowers that you have seen hummers feeding from to encourage the hummingbirds to find it quicker.
- Regularly clean your feeder with hot water and a good bottle brush to keep your hummers healthy and prevent sugar from building up and causing leakage. Soapy water can be harmful if not completely rinsed out so it is a good idea to use only hot water and add vinegar periodically.
- You can either make a simple sugar and water solution or use a store-bought version. Just keep in mind that the nectar does not need to be colored as the hummingbirds will find the feeder by its bright colors and sweet scent. Do consider increasing your sugar ratio as you enter fall to help the hummers prepare for their long migration journey south!
- To prevent “bully” hummingbirds, provide multiple hummingbird feeders throughout your yard, either in a grouping or out of sight from one another. Bullies are unable to keep up if there are multiple feeders in one spot, and unable to protect a single feeder if it is out of sight.
Tips & Tricks For Successful Bird Nesting in Your Backyard
Not only do you want to feed your favorite feathered friends, providing them shelter is also a great way to keep them around. We have compiled a few tips and tricks for successful bird nesting in your backyard, as well as information about various houses.
- Offer nesting materials such as short lengths of yarn or string, feathers, plant fluff or down, bark strips, pine needles, dry grass (not treated), dead twigs & leaves, or moss. Provide these materials nearby in piles left on the ground, wire-mesh suet cages or mesh bags hanging on tree trunks, fence posts or railings.
- Avoid using pesticide or herbicides near bird houses.
- Avoid areas accessible to cats and other predators.
- Clean bird houses at the end of the nesting season. Remove all nesting contents, clean with mild solution of 90% water and 10% household chlorine bleach.
Blue Bird Houses |
Wren Houses |
Nest Boxes | |
|---|---|---|---|
| Type | 
For blue birds, the shape and size of house are very important. The location of the entrance of the hole and the size of the hole is also critical. There should not be perch. Suitable nesting boxes when properly located are usually eagerly accepted by any bluebirds in the area. Bluebird houses be set out mid February. |

Wren houses are small nest houses that are suited for wrens as well as other small birds. There should not be perch. It is recommended to put up this house in early spring so curious wrens can investigate the structure as soon as they are ready to nest. |
Nest boxes are intended to attract various types of birds. Entry holes need to be large enough to accommodate larger birds. Be sure to place your boxes well before the breeding season begins. In the south, place your nest box by February, in the northern regions, place your nest boxes by mid to late March. |
| Location | 
Ideal location for blue bird houses are pastures, fields, open waste lands, large lawns, cemeteries and golf courses with the house facing south or southwest for warmth. The house should be near a tree, large shrub, or fence from 25 to 100 feet away so the young birds will have a better chance of reaching on their first flight. When mounting more than one house, space houses 100 yards apart and leave a screen of shrubs or trees between the houses if possible. |
Wren houses can be attached near a porch or deck, since wrens don’t mind being close to humans but it should be kept away from the busiest places. Nearby trees and shrubs will provide good shelter for the birds, but the house should not be buried in the deep foliage. The entry should be angled away from prevailing winds, as wrens are sensitive to cold, and place the house where it can get warm sun in the early morning and shade during the warmest part of the day. |

As nest boxes are for many different species, you will want to research habitat, nest height and direction preferences for the species you desire to attract before placing you next box. Many bird will reject boxes that face due west, as the box may stay too hot. |
| Mount | 
For post mount, use a smooth metal post versus wood as it offers protection against predators such as cats, raccoons and snakes. Where predators are not problem, it may be mounted on a fence post or the trunk of isolated trees (never among branches). If using on a pasture fence post, the house should be on the opposite side of the animals or placed high enough so the animals will not use them as scratchers. Bluebird houses should be mounted at a height of 5 to 6 feet, measured from the ground to the floor of the house. |
Wren houses should be positioned 4 to 10 feet above the ground, ideally attached to a wall, pole or post for suitability but some wrens don’t mind hanging or swaying from a tree branch. If you decide to hang your wren house, there are 2 screw eyes provided to make the job easier. We suggest screwing into the front and back of the peak so it hangs evenly, otherwise you could screw into either side of the slanted roof, but they would need to be fairly evenly spaced so it hangs in a balanced position. The wood is soft enough where you should just be able to screw the hooks into the desired location without pre-drilling holes. |

The nesting box can be mounted on a pole or a tree. Make sure the box is secure enough to withstand severe weather. You will need to research the species you are trying to attract to your nesting house to determine the ideal mounting height suggestions. |
Remember the insect-eating bats!
Bat houses can help provide a secure habitat for bat populations that are decreasing significantly. They give bats an alternative to your home, thus reducing the chance of human to bat contact. Bats are helpful, not dangerous animals. Less than 1% of bats have rabies. Bat Houses benefit you, your family, communities, gardeners, farmers and the whole ecosystem. By giving bats a home, they will eat thousands of insects nearby. An individual bat can eat thousands of insects in just one night. Bat houses can be installed at any time of the year, but will most likely be used during the first summer if installed before the bats return in the spring.
Location: Choose a sunny location on the East or South facing side of a building. Bat houses work best with at least 6-8 hours of direct sunlight but should not be lit by bright lights at night. Bats may find a bat house more quickly if they are located along water edges or forests. They prefer to have water, such as a pond or stream, within a mile of their house (a pool or bird bath works as well).
Mounting: Bat houses can be mounted on a building or on a wooden or steel pole. All bat houses should be mounted at least 10 feet above ground, 12 to 20 feet is better. It should be placed at least 20 to 25 feet from the nearest tree branches, wires or potential perches. Do not install your bat house above doors or windows if mounting to your house.

